 |
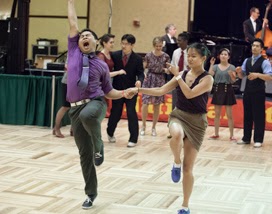
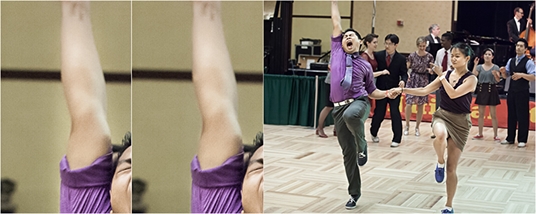
| Left: Only applying the preset from Part 1 and Part 2, Right: Final image |
Broad strokes - What's Distracting?

The first thing that bothers me is that the photo feels a little off balance. The foreground dancers are almost in the center, but are just a little bit off, so I feel like my eye wanders to the open space on the right, then gets pulled left.
Next, I thought it still looked a little bit green. I was probably looking at the back wall.

Looking back, I don't think it's that noticeable, but it made me feel better.
The next issue is the hot spot on the floor in the lower right. It is one of the brightest parts of the image, so it draws my eye a little bit in a bad way.
More Refinements - Adjustment Brush Tool
Once I've adjusted the overall image, I try to find ways that I can emphasize the foreground dancers. This is the slow part. |
> |
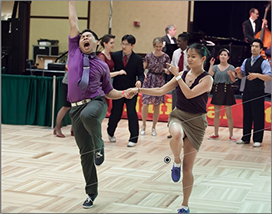
| Adjustment Brush mask area | Increase Exposure +0.73 and Highlights +5 in painted area |
Here, I used Adjustment Brush and painted a mask.
In the mask, I raised the Exposure +0.73.
Across all the photos, I varied the Exposure adjustment from about 0.5 to 1.5 stops.
Also, I raised the Highlights +5. As it turned out, the Highlights were not that strong, and in many other photos, I changed my mind and actually wound up reducing them by -10 or so.
 |
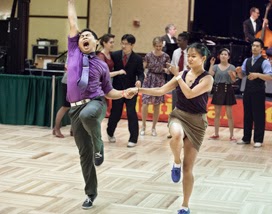
| Saturation +25 in the painted area |
I raised the Saturation in the Adjustment Brush area by +25. The purples and blue on the dancers should be a little deeper here. Also, as colors get more saturated, they often get darker, so this is fighting the brightening from the previous step.
- Contrast will make dark areas darker and light areas lighter. But surrounding areas have no affect over how light/dark to push it.
- Clarity tries to sharpen edges so neighboring areas have some influence and is like a more local contrast. Also, sometimes I feel like Clarity will have an overall darkening effect.
 |
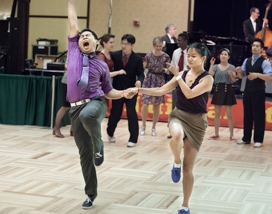
| Applying Contrast or Clarity to the painted area |
- Exposure +0.73
- Contrast +20
- Highlights +5
- Clarity +20
- Saturation +25
One "last" thing to take care of on this one: there are some >ahem< dark areas on the shirt that I actually want to get rid of and raising the contrast and clarity just made the problem worse.
In other photos, I also desaturated the dark areas and/or shifted the color temperature to try to better match the surrounding area. But in this case, I only painted in exposure adjustments.
I'm pretty sure this part (painting mattes for the dark spots) by itself was in the 3 to 5 minute range. Luckily, I didn't have to do this for many photos, but it required a lot of fine grained adjustments and a lot of brush strokes. I know I didn't completely eliminate the problem, but I hope I lessened it a little bit.
This is the image that I first published in my Camp Hollywood set, and it's still there on Facebook.
And that concludes the story of editing that photo.
Here, I'll apply the same ideas to another photo. In a lot of my evening photos, there were lights on the stage, even when there was no band. This made anything white really bright and I thought it was especially distracting in a still image. When I just applied my preset, the drums and the shirt were by far the brightest things in the scene, so even when I'm looking at the faces, there's something pulling my eye away.
 |
| (Click to Enlarge) |
There were a lot of shots where I used an Adjustment Brush to target the drums, often a shirt, and (sometimes) the glare on the speakers. Here, I used the Gradient Tool, but with the same settings that I would with the Adjustment Brush. I tried to mostly work with the Highlights(-74) because the problem was really in the brightest areas and I didn't want to darken anything else (like the faces). But that wasn't enough, so I knocked the Exposure down a little bit.
For the Adjustment Brush, I've gone though most of these settings in the first example. A few differences:
- I raised the Exposure more, so I compensated by taking down the Highlights.
- I experimented a little bit with warming up the Color Temperature slightly. I haven't figured out the units for this in the Adjustment Brush yet but it doesn't feel like it is K.
- With these colorful costumes, I could get more out of saturation, so I pushed it a little more for the dancers. By contrast, the preset reduces the saturation on the red and yellow banner in the background, which would normally compete for attention.
Conclusion
A long time ago (Oct 2011) when I had my last burst of posts on this blog, I said something like "next time, I'll talk about composition and editing" and abruptly stopped. This is a lot of what I had planned to cover. I also had a broken link to some course materials that have moved. I found those materials again in an archive:http://old.siggraph.org/education/materials/siggraph_courses/s96_course30.pdf
Specifically, look at the Sharon Callahan chapters on emphasis and balance.
In this post, I ran through some examples of how I tried to emphasize the dancers and to de-emphasize distracting parts of the background that pull focus using some of those ideas:
- Value/Brightness (usually though the Exposure slider)
- Saturation
- Contrast/Clarity
- Cropping for balance
This is most of what I intended to cover when I stopped last time. I was also going to show examples for cropping and tangents and touch on the "rule" of thirds, but maybe I'll cover that some other time.
In the next couple posts, I'll apply the same ideas in composition to a couple other examples from Camp Hollywood with different lighting situations. Then I'll wrap it up and talk more about the process and logistics.
No comments:
Post a Comment